

- How to Shoot Milky Way Nighttime Landscapes
- New Product Announcements (Fujifilm X-H2, Best of Blog 4)
- In the Pipeline (Fujfilm X-T5, Sony A7R V)
- Noteworthy Factoids about the A7R V
- Three fascinating Cameracraft articles
- The photographer who Ansel Adams referred to as "The anti-Christ"
- AI Image Generators - what they may mean for society
- A portrait of Michael Colin Campbell - Kodak color chemistry pioneer
How to Shoot Milky Way Nighttime Landscapes
The Friedman Archives welcomes guest blogger Erik Quimby to explain how he gets these incredible Milky Way images. (Spoiler alert: you can get results like this too!)
Taking amazing Milky Way photos is not very difficult if the
right preparations have been made. Location, time of the year, day of the
month, and gear selection all make or break a great Milky Way shot. (Click on any image to make it larger and sharper.)

A good solid tripod is a must. If the location is windy, having
something to weigh your tripod down may be necessary. If your camera has a 5 to 10 second shutter release delay
great, but if not, a shutter release trigger will help to prevent camera
shaking while pushing the shutter release button down.
 |
| This one was lit by the light of a cell phone. |
Settings will vary depending on camera and lens combination,
but a good starting point for exposure is ISO 2400 for 20 seconds at F1.8. Then adjust ISO
up or down until the exposure looks good. Make sure to check that the stars are pinpoints and not streaked or oblong. If they are, shorten your shutter time to 15 or even
12 seconds. Make sure to turn auto focus off and turn off internal image
stabilization.

After careful planning and preparation, along with spending
the night standing in the dark (taking a folding camp chair is helpful too)
staring at the stars you can be rewarded with amazing Milky Way shots to be
proud of. But a fair warning, chasing the Milky Way can be very addictive. Very
addictive!
Erik Quimby, Photographer
Instagram: http://www.instagram.com/quimby___/
Portfolio: http://erikquimby.myportfolio.com/
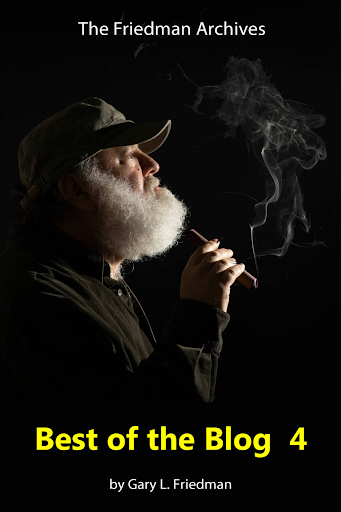
Best of the Blog 4 is now available! These 'Best of the Blog' titles combine the best of the blog posts as well as the most interesting articles I've written for Cameracraft magazine. Think of it as essential reading. In this compendium:
- Rememberance Photography
- A Brilliant Way to Find Perfect Portrait Light
- Better Autumn Photos in One Minute
- Back Button Focus
- The Best Story I Ever Told
- Turning your Camera into a high-quality webcam
- Computational Photography
- Which camera has the best “Color Science”?
- The Shrinking Market for Photographers
- Using a Grey Card to Nail Exposure and White Balance
- Focus Stacking tutorial

You can also purchase a 4-volume downloadable bundle (the entire series so far) at a discount here. This represents probably my best work over the last 15 years.

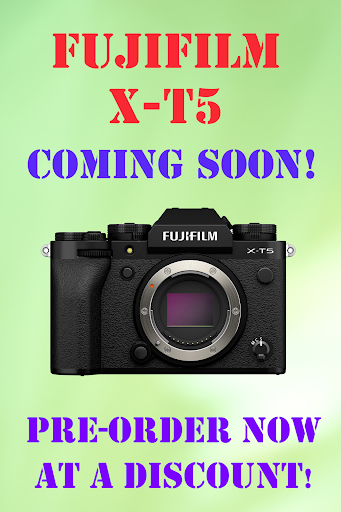
And now Tony's spending the Australian summer working on a book on the new Fujifilm X-T5! As always you can pre-order new titles at a discount.
Noteworthy Factoids about the A7R V
I've started working on the A7R V book. Great camera; as they've improved so many small things. For starters, they've added a focus bracketing function that I lamented was missing from a recent blog post (they must read my stuff! :-) ). For finishers, they added some functionality to their Imaging Edge Desktop software that helps clean up artifacts of things that move while making high-resolution pixel-shift images.
As usual, Sony has changed the format of their RAW files and Adobe products haven't caught up yet. So the only way to use the A7R V's RAW files is to run it through The Imaging Edge Viewer program and convert it into a 16-bit TIFF. But the process is now buggy; when I have it process a batch of photos only a small percentage convert successfully. I've contacted Sony about this; hopefully it will be a fast and easy software patch.
This book will quite interesting. And as always, you can pre-order the book now at a discount.

Next Time in Cameracraft Magazine
The upcoming issue will be more impressive than usual, as David and I are working on three significant stories:
 |
| Darkroom printing with distortion by tilting or bending the paper |
Find out more about his pioneering work and his techniques in the next issue!
2) I also take a deep dive into the AI Imaging technology behind Lensa, Midjourney, Stable Diffusion, and DALL-E 2. Will it put photographers out of work, or just give people illiterate in the ways of Photoshop a means to generate revenge porn or otherwise create realistic images of things that never happened? (Spoiler alert: It's not going to be an all-glowing review.)
 |
| This image was generated via the following text prompt: "close-up of a very colorful Amazonia frog. exquisite detail, 30-megapixel, 4k, 85-mm-lens, sharp-focus, intricately-detailed, long exposure time, f/8, ISO 100, shutter-speed 1/125, diffuse-back-lighting, award-winning photograph, facing-camera, looking-into-camera, monovisions, elle, small-catchlight, low-contrast, High-sharpness, facial-symmetry, depth-of-field, golden-hour, ultra-detailed photography" |
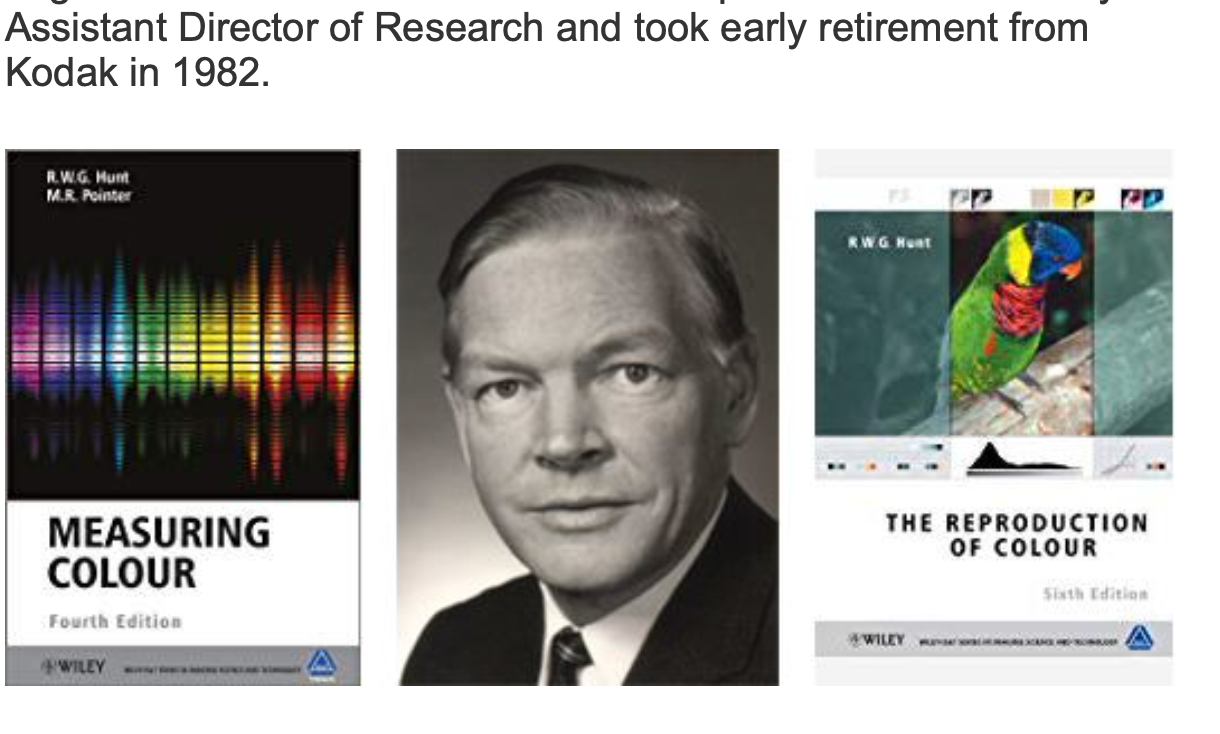
3) A profile of Michael Colin Campbell, who is not only an outstanding portrait photographer and painter but also worked for Kodak and helped pioneer their color chemistry back in the day. A synopsis:
So why do inkjet photo printers need CMYK when these high-end fine art prints, regular lab photo prints and dye sub ‘events’ printers only need CMY? And why do photo prints look good with just CMY when a good photo inkjet printer needs anything from 8 to 12 inks?
Here’s the answer: CMY photo papers, wet processed by photo labs, do not use pure CMY. Each color contains enough impurity (the other two colors) to add some neutral density. When all three combine, this extra grey is enough to produce a good maximum density and natural looking black. Dye sub printers have similar impure colors.
But this means these can’t ever produce the most vivid color prints. The dyes Michael Campbell researched, and Kodak used for dye transfer prints costing hundreds of dollars each, are purer and more intense but with enough density to give a good black without needing added neutral density. The prints they made (and still make in specialist processes) have a greater gamut.
Good inkjet photo printers using ink sets with Black, greys, added Light C and M and sometimes extra Red, Orange, Green and Vivid Magenta can do the same. The prints never look just like a traditional photo lab ‘dirty CMY’ color print. They are better - but we are so used to photo lab prints most people prefer them.
===
Subscribe to Cameracraft Magazine today and get insights you just won't find anywhere else! Digital as as well as printed editions are now available.
Until next time,
Yours Truly, Gary Friedman
(Home of the densest blog posts on the planet (tm))


Camera RAW updated this morning, v15.1, and it includes support for Sony A7R V (ILCE-7RM5)
ReplyDeleteGreat news!
DeleteI've been dabbling in Midjourney for a couple of weeks and getting some pretty cool images. I didn't know you could use such a long detailed prompt like you did for the frog image. I'm looking forward to reading your article about AI image generation (I just subscribed to Cameracraft)
ReplyDeleteThanks for subscribing, Bjorn! I've been playing with Midjourney for a couple of weeks myself and am quite disappointed by the low yield of impressive results. It's truly a hit-and-miss technology right now, and I have a good idea of what's needed for it to evolve into a useful tool for artists of all sorts.
DeleteNice! But it doesn't look like a candy bar. -Doug
ReplyDeleteNext time I'll talk about Snickers landscapes. :-)
DeleteReferring to the comments about Sony's A7R V why don't Sony and other camera manufacturers give up their proprietary raw files such as ARW and standardize on Adobe's DNG that we end up having to convert our raw images to when we load into Lightroom etc?
ReplyDeleteThere are technical reasons that most of the major camera companies don't offer a 'save as .dng' option, and almost all of them have to do with the fact that the DNG specification doesn't allow for camera feature specific metadata. Two examples that come to mind are storing what focus point was used (Sony), and storing where the dust is in Canon cameras so their software can remove it later.
DeleteHi Gary,
ReplyDeleteHow many extras were added onto the end of the Frog photo description just to see if people were awake or just to make fun of the crowd who are jargon snobs LOL ...
"facing-camera, looking-into-camera, monovisions, elle, small-catchlight, low-contrast, High-sharpness, facial-symmetry, depth-of-field, golden-hour, ultra-detailed photography"...
Rodger.....
A7r iv a ,
Sony 100-400mm GM,
Sony FE24-240mm f3.5-6.3,
Sony Zeiss 16-35mm F4,
Olympus OM-D EM-1,
Olympus M Zuiko 12-100mm F4,
olympus 14-150mm f4-5.6 mark ii...
;) LOL
Dense but extremely informing ! ;)
ReplyDeleteThanks! :-)
DeleteHappy holidays, Gary! Thank you again for sharing your love for photography with us all!
ReplyDeleteGary - My A7rV just arrived so I am looking forward to your book. QUESTIONs - If I order the hardcopy, does it include the e-version? Is there any discount ordering the hardcopy now?
ReplyDeleteAll versions of the book are available now: https://friedmanarchives.podia.com/the-friedman-archives-guide-to-sony-s-a7r-v Yes, the hardcopy includes a free version of the .pdf!
DeleteGreat post, Gary! If you’re serious about your business idea, where can I find more info?
ReplyDeleteHave you played with any AI image generators, and if so do you have any suggestions about good keywords to use to produce better output?
I’m also looking forward to your next video about the Sony A7RV - your “missing manual” videos are always top notch! 🍻
I'm only semi-serious, as I feel my entrepreneurial days are over. But at least I can use this platform for identifying areas of need and spreading ideas.
DeleteAs mentioned in the current blog post ( https://friedmanarchives.blogspot.com/2023/01/ai-alarmists-are-worried-about-wrong.html ), I have dabbled in MJ and SD enough to understand their limits. There are lots of tutorials out there for recommending text input to achieve a certain effect - I'm not the guy to ask for those things.